Showing posts with label competitive gaming. Show all posts

Sunday, August 21, 2016

Designing Necromancy Part 4: 10-4


I've talked about the Queens and the Jacks, now it's time to talk about the 10s that I mentioned iterating upon in my last blog. All the number cards are essentially meant to be fodder when compared to face cards. They can have effects on the game and when combined with Possessors they can become powerful, but their primary goal is to act as a face-down casting resource, or a low-cost face up card to PacMan in preparation for your face card to Overtake it. (If you missed the meaning there, go back to the first blog.)

10s, however, are meant to be above and beyond the Fodder, with unique attack methods when compared to their brethren. Rather than just a single standard attack for their battle phase, they may attack in various augmented ways.

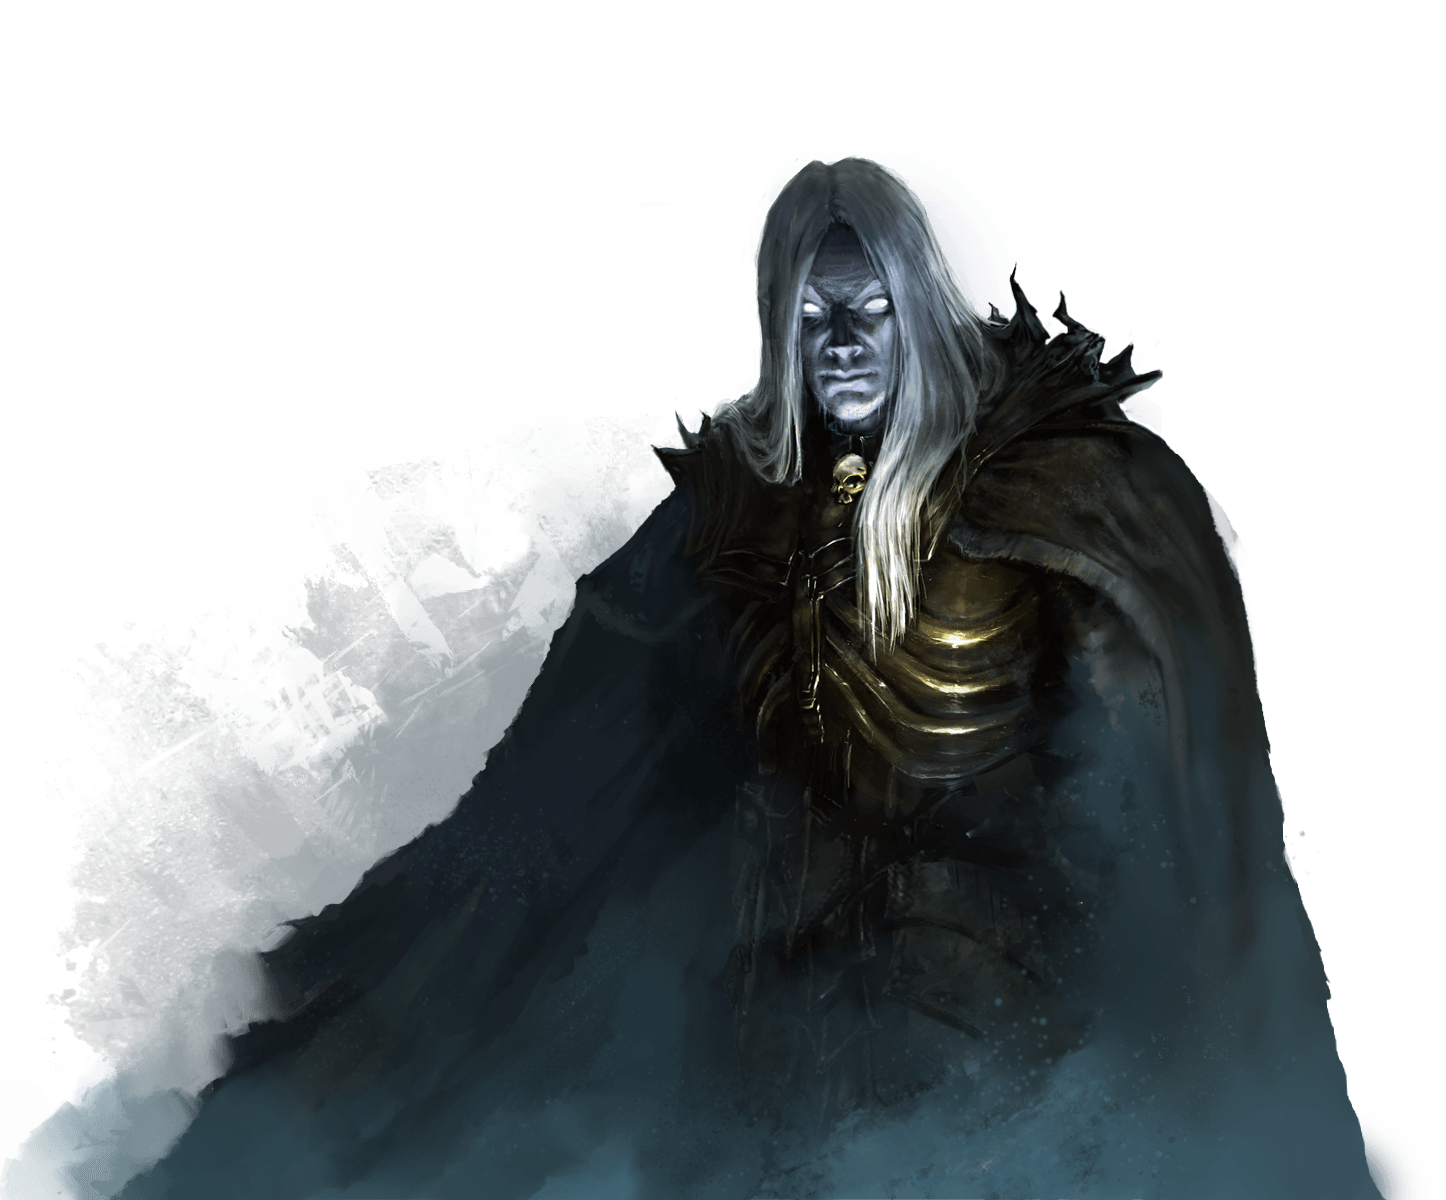
So without further ado, let's talk about the 10 of Skeletons: The Skelettin.


(I'm actually surprised I found a picture so easily for this.)

The Skelettin is a two-headed Skeleton Giant. And because two heads are better than one, Skelettin has the ability to declare two attacks during a battle phase. Those two attacks do not have to target the same creature, so it can act as a fodder clearer or declare its two attacks against the same target to chip away at BigBads. In fact, there are only 4 creatures currently in the game that Skelettin can't destroy in one turn if they are using their base stats. (Possessors or certain card effects can change this.)

It's a very simple creature design, but it allows for some extra impactful decision-making for the Skelettin. Additionally, depending on how I ultimately end up handling battle phase, his double attack may equally be a curse, since it also may mean he receives damage twice during his own battle phase. I haven't quite sorted out how I'm going to handle combat just yet. Presently, a creature can either move OR attack, and attacking allows the defending creature to attack back with its own attack stat. I'm probably going to be testing a change to where you can Move+Attack in the same turn, which proves a counterattack from the opponent, or you can simply attack with no counterattack if you are already adjacent to the opponent. (This will greatly buff Bone Dragon, the Skeleton Queen, who can declare attacks on any card in the Graveyard, as well.)

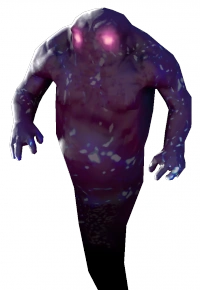
Now, on to the 10 of Ghosts: The Will-o-the-Wisp.


Will-o-the-Wisp is one of my favorite crossovers between a real life phenomenon and folklore. It's present in Super Mario RPG, Pokemon, Paradise Lost, Rime of the Ancient Mariner, Dracula, Harry Potter, and multiple other famous works or franchises.

So I had to include it in Necromancy, especially since it's such a staple of Ghost Pokémon. It's effectively Ghost Fire in those games.

You may expect, “Oh, that means it's going to be a Possessor that deals damage every turn it's attached, right?”

I'm sorry to disappoint you, that's the unique gimmick of the Banshee, the Queen of Ghosts! The Will-o-the-Wisp is a fire that just won't die.

Its effect is:

The possessed creature gains +2 Damage and Reanimates. Will-o-the-Wisp Reanimates with the creature it possesses.

Reanimates is a Keyword, an ability that is represented in the game's official rules. On the player's next upkeep phase, they may choose to revive this creature. If they choose to, Will-o-the-Wisp Reanimates with it, remaining in control of the creature. Typically, Reanimates is a feature of the Zombies – they are meant to be persistent threats on the field (or, at least, annoying pests that you can't keep down).

However, with the Will-o-the-Wisp, any creature can become a reviving threat you must find a way to deal with, whether the possessed creature was yours or your opponent's from the beginning.

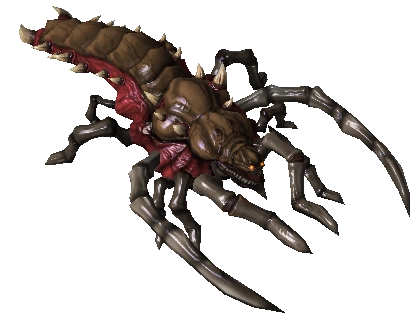
Up next, the 10 of Zombies: The Plague Beast.


The Plague Beast is essentially a pestilent zombified animal. And so it was pretty easy to decide what its effect would be: Its attacks are Venomous.

Venomous is another Keyword. After the Plague Beast attacks a creature, that creature is marked as Poisoned, and during each of its Controller's upkeep phases, the creature takes damage equal to Plague Beast's attack value. (Plague Beast's basic attack still deals damage, it just deals additional damage on each ensuing turn.)

I'm not entirely certain the ability is strong enough to match up against that of the other 10s. So I'm exploring the idea of having the Venomous effect also reduce a Poisoned creature's attack by the Attack value of the creature with Venomous. (In Plague Beast's case, this would be 2. This may be different for future expansion set creatures or creatures that may gain Venomous from Crypt Effects.)

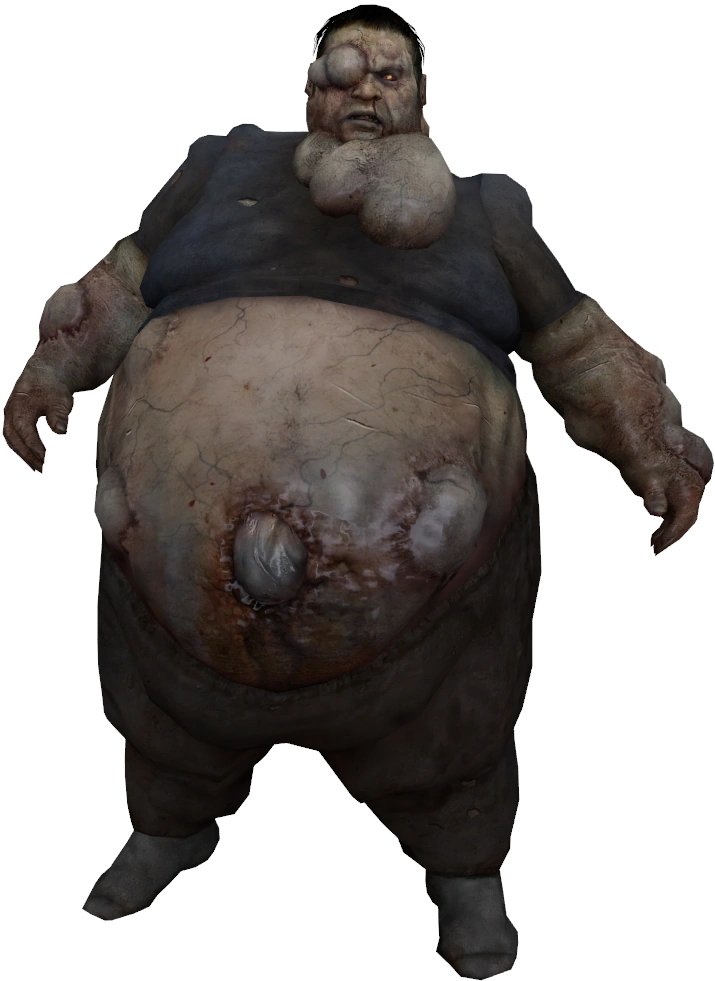
And finally, we come to the 10 of Ghouls: The Gourmand.


I had a bit of difficulty coming up with an effect that truly fit a Consumer, but in the end, I created yet another Keyword to make the Gourmand truly unique in its method of attack: Swallow.

The Gourmand has a relatively low attack stat (3), but thanks to its Swallow ability, it can still cause a lot of pain to the enemy. If Gourmand attacks and does not destroy the enemy, it consumes Souls from the target's Soul Stack equal to Gourmand's attack stat. (Gourmand's attack may be reduced to 2 after testing.)

This has two effects: 1) Gourmand gains additional souls in its Soul Stack, so if it had been summoned on a Queen, King, or Ace, it might be Overtaken on the player's next turn. 2) Gourmand consumes souls from another Soul Stack. Consumed Souls cannot be used as Overtakers. They are effectively removed from play until the creature on top of them is Destroyed. Effectively, Gourmand becomes a creature who shifts the balance of power toward its Controller by reducing the control the opponent has on whether or not his Soul Stacks can be used for Overtaking.

Currently, Gourmand is the only creature with Swallow in the game.

That covers all the 10s in my current set for Necromancy. I'm not sure when I'll blog again, but I do believe the next blog should cover the Kings, which I've only touched on in passing. Kings are all very strong creatures, though I don't think they are currently balanced very well. So after my next iterative pass on them, I'll be sure to explain the design process behind them and their new effects on the game.


Thanks for reading!

Wednesday, August 17, 2016

Designing Necromancy Part 3: Jacked Up.


So it's been a while since I've talked about my Necromancy card game (mostly because I've been busy with other things, mostly Halo related pursuits). But I've finally gotten back into the swing of working on polishing the design, and giving a more consistent, intentional purpose to each level of card in the game.

Today, I'm going to be talking about the Jacks of each suit, and my design goals I set forth after editing the first draft of cards, which were mostly just thrown together for the sake of getting the game's core mechanics to a state they could be tested.

To start, let's talk about the Jacks of the Undead.


As I said in my last blog, my goal for the Queens was to be a temporary power spike on the field that could drastically alter the field but would lose power and influence after a few turns. The Queens fit the themes of their respective suits, and for a short time, are the strongest of their type.

The Jacks, however, don't like to play by the rules. They like to be different. And so with Jacks, my goal was to avoid the standard classes (Destroyer/Consumer/Possessor) of the suit, or to have play patterns significantly different than their fellow suited undead brethren.

The Jack of Skeletons


Much like the King and Queen of Ghouls, I realized my 10 and Jack of Skeletons were swapped from my goals for them. And while I'll go more into the 10 of Skeletons in my next blog, for now I'll just mention that the Skelettin and Bone Prison's card number were swapped to fit the patterns I desired.

Most Skeletons are destroyers. Skelettin was a Destroyer. Bone Prison, however, is a Possessor. So it was pretty obvious to me when I established my new design goals for 10s and Jacks that these two needed to be swapped.

Bone Prison's effect makes it a very powerful Possessor for countering massive threats on the field.

The possessed creature cannot move, attack, or be attacked.

It has a fairly high threshold (possession strength) for a Possessor, making it able to possess almost any card in the game. And essentially, Bone Prison removes that card from play. While most Skeletons are focused on just being strong threats that can turn a creature back into a stack of Souls, the Bone Prison's job is to put a creature into effective stasis for the remainder of the match. Your opponent's only reaction is to say to himself, “Welp, I'm boned.”

The Jack of Ghosts


Ghosts are a suit comprised almost entirely of Possessors, so it's only fitting the Jack of Ghosts to be a more combat-oriented class. Thus was born, the Eidolon: a Destroyer.

The Eidolon is a very weak card statistically, a meager 2/2 with a casting cost of 4. But that's where his effect comes in:

If Eidolon is possessed, its Damage and Health are increased by the Threshold value of its Possessor.

As a reminder...or just in case I haven't mentioned it previously: players may use Possessors on their own creatures. Possessors can double as a “I want to use this card of my opponent's” or as equipment cards, to power up their own creatures. So Eidolon effectively becomes a combo-focused card, meant to be summoned in a safe zone far from your opponents and possessed by one of your own creatures, where he may then wreak havoc across the board as a high damage, high health undead warrior. He's potentially the strongest creature in the game, especially when combined with the King of Ghosts...which I'll talk about another day.

The Jack of Zombies


Zombies are a suit dedicated to being persistent threats on the field. Many of them reanimate at the end of the turn in which they were destroyed. So of course when I set out to design the Zombies' Jack, I had to call up the old Zombie game trope of an exploding corpse.

Volatile Cadaver is just that. A Destroyer (just like the rest of the suit), that makes sure to take someone down with it.

When Volatile Cadaver is destroyed, its Owner may destroy up to 2 adjacent creatures. If creature targeted by this card's effect has more than 10 Health, deal 10 Damage instead.

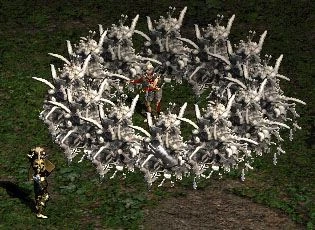
Volatile Cadaver's made to be sacrificed for the greater good – the reverse Hydra method. Where one Cadaver falls, two enemies shall go with it. As much as I loved Diablo 2, I couldn't possibly make a Necromancy game without Corpse Explosion, now could I?

And, just in case people decided to try to avoid attacking the Cadaver... if you happen to have it in the Crypt (assuming I keep the Crypt mechanic), Volatile Cadaver gains Taunt, forcing it to be targeted by adjacent opponents.


The Jack of Ghouls


Ghouls are a suit of Consumers, so I didn't want to give them another combatant as their Jack. Thus the Defiler, a Possessor, was born. Unlike most Possessors, which focus on flat buffs to the cards they possess and tend to be more beneficial for already strong cards, the Defiler can be used in two ways, thanks to the wording of its effect.

The possessed creature becomes a Consumer, with a Damage value equal to the number of Souls in its Soul Stack.

If the Defiler possesses a creature with a high attack but only a few Souls in its Soul Stack, it actually debuffs them, making them more able to be destroyed. However, the Defiler can also be used to possess a weak creature to make it able to become a larger threat as long as it remains on the field. Thanks to the conversion into a Consumer, the Defiler's possessed creature grows stronger with each combat victory.

While the Jack of Ghosts is most definitely intended to work within its own suit, the Jack of Ghouls is best when working with Skeletons or Zombies, which are generally not already Consumers.

That's it for the talk about Jacks! Expect another blog on Friday to talk about the overhauls to the highest of numbered cards, the 10s.


Sunday, December 27, 2015

Designing Necromancy Part 2: The Queens of the Dead


In case you thought I forgot about working on Necromancy, I haven't – I've just been busy with work due to the Christmas season, and with some other work with Halo. I am still definitely working on Necromancy, and I thought I'd write a blog to talk about some of the things that I've learned from additional playtests, as well as introducing you to the Queen cards of the four suits (Skeletons, Zombies, Ghosts, and Ghouls, in case you've forgotten.).

First things first, we'll start with...

The Second Playtest

The start of the second playtest made me realize I had an unclear rule regarding the Overtake mechanic (where a dormant creature can destroy a creature summoned on top of it once a soul stack reaches a certain number of souls) – It wasn't made clear in the rules that Consuming a creature voided all “Dormant” souls, permanently preventing them from being used to Overtake. I've got some ideas on some other ways to handle this other than outright preventing it, but for now I've just set the rules to where once a creature (and its soul stack) are Consumed, those souls are JUST souls for the remainder of the match.

The Pac Man mechanic (if you forgot, basically, you create a line of souls and move a weak creature each turn onto a new soul in order to build your Soul Stack to Overtake with a stronger creature) was in full swing in this game, but a more interesting metagame developed where attempted Pac Man chains from Destroyers would be interrupted by 1 Cost Fodder being summoned in the way. (This doesn't work versus Consumers, as it simply feeds them faster) – but for Destroyers, it effectively causes one Soul Stack to build and build until an even stronger creature can be summoned on the spot and stop the Pac Man in its place.

This game ended up with a Lame Duck ending similar to the first test's, however, as the same Consumer managed to get too far ahead and become unkillable.

The Third Playtest

The third playtest, I decided to test a different strategy from the previous (where I was pretty focused on either player going for a bigger creature early) – instead I went for a low level creature immediately and attempted to Pac Man from the start. Both players had to posture for position on the Graveyard to Pac Man without moving into range of one another...or to interrupt the others' attempts. Blatantly obvious Overtake Traps (or benign bluffs) could also be set in the opponent's Pac Man path to make them change directions toward a future play, reassuring me that the game's depth of player interaction was definitely going to be good once a player base that wasn't me playing against myself was developed.

Much of the third's playtest (nearly 15 turns per side) revolved around a Hungering Carcass (basically a Fodder Ghoul) that had been possessed by Player 1's Spirit (a fodder Ghost possessor that granted bonus health and made it very difficult to kill without stronger opponents...though, there's a catch-22 here that every soul consumed by the possessed Carcass at the time actually counted toward the opposing player's score, since the Owner of the Hungering Carcass was Player 2.

By Turn 30, the score (not final until the game actually ends) was 24-4 in favor of Player 2, thanks to an amassed stack of souls on the possessed Carcass, as well as a Bone Warrior that was Pac Manning his way to prepare to summon the Icon of Death (Ace of Ghosts).

On a late turn, Player 1 finally Overtook one of Player 2's Soul Stacks with the Queen of Ghouls (Blood Raven), drastically shifting the score (22-17, still in player 2's favor).

As Player 1 was poised to win with Blood Raven amassing a stack of souls, Player 2 responded with Open Grave (the King of Zombies...and also the creature that had single-handedly won games 1 and 2.) The game ended with Player 2 using Open Grave to attack and consume his own Icon of Death to keep the opposing Blood Raven from doing so and stealing those final souls, a decision which ultimately ensured Player 2's win 26-25 as his final discard onto the field was the only neutral soul left in play when both players ran out of cards.

Lessons Learned

  • Open Grave was too overpowered and needed to be nerfed. He has been nerfed since those playtests.
    • Don't make creatures whose Health AND Attack are increased by the number of souls in their soul stack also be Consumers. I ended up nerfing him by making his health a flat amount that does not increase, but he can regenerate health by consuming.
  • Pac Manning, although it started as emergent counterplay to huge creatures, has pretty much become core to the Necromancy experience, building up huge Soul Stacks by using fodder units to “carry” them around the field and stay away from enemy units.
    • But, enemies can interfere with your route by their own positioning, or by discarding along your route to bait an Overtake, as they cannot move+overtake in the same turn, so moving onto a card you have placed in their intended path gives you Overtake advantage.
  • The ability to attack your own creatures can lead to some interesting interactions and clutch situations, especially when Consumers whose attack values are based off the number of Souls in their soul stack are involved.
  • Blood Raven didn't actually fit the design of other Queens, while Devourer (King of Ghouls) seemed more Queeny. I needed to swap their designs.

So, now, moving on... let's talk about

The Queens of the Undead


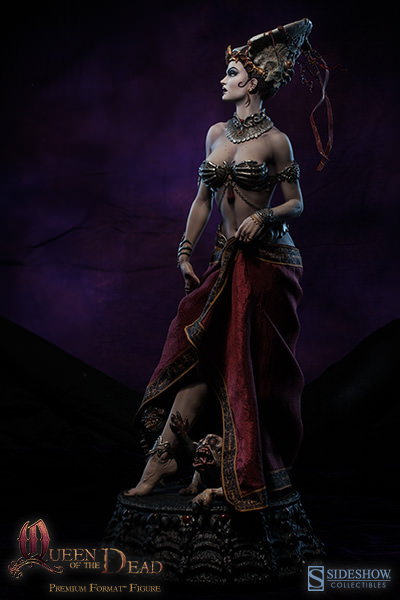
Before I ever designed any of the cards for Necromancy, I made an outline/rubric for each Suit. The Ace of the base set would be one of the Four Horsemen of the Apocalypse (Icon of War, Icon of Death, Icon of Pestilence, Icon of Famine). 2, 3, and 4 were Fodder. 5, 6, and 7 were a little stronger. 8 and 9 strong, but still pretty basic. 10 and Jack were Special creatures that were Strong. Kings were Major Threats (I overstepped with King of Zombies, as I've mentioned.). But the Queens... I gave them something a bit special. I wanted them to be higher cost cards than all but the Aces/Icons (which gain power based off other cards of their suit in the Graveyard and cannot be Overtaken.)

Originally, I didn't put much thought into how I wanted this to play out, and a few of the Queens were fairly boring (namely the Skeleton and Ghost Queens). Neither of them saw play in the first three Playtests, and I realized why they felt boring. They basically had no benefit for costing so much compared to Consumers who'd cost less (which is also why Blood Raven saw play in Playtest #3, since her design was more akin to a King.)

I realized shortly after what I wanted to do with Queens – I wanted them to each be a surge of power for high cost, high risk, high reward impact on a gameplay. A power spike, if you will. A table flipper that could shake up the situation on the Graveyard, but if not handled properly, just as much a liability for the user. Because that's what you'd expect from a Queen. For them to be the divas of the stage who need special attention.

The Queen of Skeletons

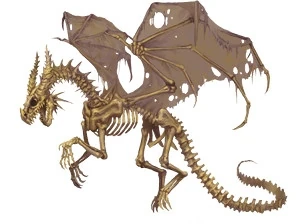
Although I have made drastic changes to the original incarnations of the Queens, their identities have not changed... and the Queen of Skeletons is none other than the Bone Dragon.


When trying to figure out what a Bone Dragon should be able to do that would make her feel like a surge of power, I paid close attention to the part where SHE'S A FUCKING DRAGON. A dragon will fly from its nest, wreak havoc, and then return home.

So for the Queen of Skeletons, the Bone Dragon... the card effects read as follows:
(pardon the weird formatting, these are copy/pasted from an OpenOffice Calc spreadsheet, and apparently neither OpenOffice Writer nor Blogger's website enjoy that)

Bone Dragon may target any tile in the Graveyard to declare an attack.

Bone Dragon's Damage decreases by 2 each time it attacks.
Basically, she can set up shop in the corner of the Graveyard, and then say “FUCK YOU I'M A DRAGON” on any weak monsters you believe you are going to use as Pac Man fodder. However, she has a limited amount of ammo for her long-ranged attacks, as her attacks get weaker and weaker with each attempt. At present, she has 12 Damage for her starting Damage, so essentially she gets to attack 6 times before she retires to a mountain of gold and the desolation of smugly fucking over your opponent's strategy.

The Queen of Ghosts

The Queen of Ghosts was the first Ghost I named, because I knew it positively had to be the Banshee.


Because the general theme for the Ghosts' suit is Possessors, I wanted to actually keep the Ghost Queen a Possessor, so I needed to focus on how to create a power spike from a creature designed around possessing other creatures.

While most Possessors are focused around empowering another creature (giving them health, or damage, or the taunt ability or the ability to reanimate...and if you think that's odd, bear in mind you can possess your own creatures as well, essentially using Ghosts as Equipment Cards for your fellow creatures.) I took a different route with the Banshee.

Banshee starts off with healthy chunk of health, making her hard to kill. However...

Banshee loses 3 Health during each of its Owner's Upkeep Phases.

But she's a Possessor, so she still wants to possess someone else, yeah?

If Banshee possesses a creature, the possessed creature becomes the target of Banshee's effect.


Basically, Banshee is a Ghost you summon in order to drain the life of an opposing creature slowly (or just enough to weaken them for a coup-de-grace from one of your other creatures.) In short, she's a ticking time bomb you want to attach to an enemy creature.

Oh, and if you're a Halo fan and you're reading this, don't think I didn't include a Banshee Bomb... here's Banshee's Crypt effect:
Banshee may inflict its Health as Damage to an adjacent target. Destroy Banshee.

(Crypt effects currently are effects that are only active when the creature is active on the tile where the first creature of the game was summoned. This helps to create a sort of arms race for someone to summon the first creature, as well as a point of power for which both players want to fight for control.)

The Queen of Zombies

When I was thinking of a Queen for Zombies... I couldn't help but get a (WARNING: NSFW IMAGE) specific creature (WARNING: NSFW IMAGE) from the Gantz manga out of my head.

The Queen of Zombies in Necromancy is known as the Corpse Golem. Because of science. And Japan.

The Corpse Golem is the only creature that hasn't needed to change from its initial creation to my “reworking Queens” pass. Her effects are as follows:

Corpse Golem's Damage is increased by 1 for each Soul in its Soul Stack.

Corpse Golem's Health is reduced by 3 each time it attacks.

She has a fairly low base attack (because the casting cost is added into it), but similar to Banshee, she has high base health, because any time she takes action, her health is whittled down. This means she can pack a whollop for a few turns before she finally calms down (or destroys herself). If her Controller has control of the Crypt as well, she can move there in order to regenerate some health each turn.

I feel she really embodied (eh heh heh) my initial plans for Queens quite well, and she was the paradigm I used to redesigning the other 3.

Finally, we move on to

The Queen of Ghouls

If you're wondering why I named the Queen of Ghouls Blood Raven, it's partially because the Ghoul fodder is called Carrion Crow. It's also partially because of Diablo 2, and partially because of Game of Thrones. Blood Raven is a familiar name to a wide variety of nerd subcultures.


With that said, my main problem with her original design was...well, she was the type to get stronger as a battle went on. It's why she put Player 1 in the position to come back and win playtest #3. She was a Consumer who got STRONGER as she consumed. Which was the opposite of what I wanted Queens to be. On the other hand, the King of Ghouls got weaker as he stayed on the field. Oops! Looked like I had the two's effects backwards.

As a result, I effectively just swapped the two. But in the process, I also buffed Blood Raven's stats considerably to make her more attractive that the King of Ghouls had been (as I had seen no reason to summon him in any of the previous 3 games. He seemed like a trash can card.)

Now, Blood Raven sits at a massive 30 damage and 6 health. Which may seem absurd, but...

Blood Raven's Damage is reduced by 2 for every Soul in its Soul Stack.

By default, she will never actually have more than 18 damage (since her casting cost is 6). And, if she destroys any other large stacks, she effectively neuters herself for the remainder of her life. However, she's still a massive force to be reckoned with when she first comes onto the field, giving the exact feel I wanted to evoke from a Queen.

With these card designs and re-designs, I feel the Queens of every Suit have a certain similar flavor of play that will both spice up the game and encourage players to go all-in for a woman they love some time.


That's all for this second blog on Necromancy. I'm not sure when the next one I'll post will be (probably sometime within the next 2 weeks, as I will be making actual distributable decks very soon thanks to a few Christmas presents I got...so work on Necromancy has resumed.) When I do get around to it, I'm going to talk about Possessing and Possessors.

If you are interested in helping me test Necromancy (or sending me any quantity of money to encourage my continued development of the game), please reach out to me on Twitter or however you can and we can discuss details.


Until next time!

Saturday, December 12, 2015

Ambiguous Revelation: The Dangers of Uncertain Exposure

It's been a while since I've worked on any Audley Enough stuff. But today, while reading a Reddit post distressing over the lack of power supports have in League of Legends these days due to repeated nerfs to vision control over the last few seasons... I thought it was about time I talked about a subject that's been weighing on me for a few weeks now.

That subject is what I'm labeling Ambiguous Revelation...and it's a very bad thing to have in competitive games centered around imperfect information.

When I say Ambiguous Revelation, I specifically mean, “When you give away information to the enemy, but cannot be sure if you've given away that information.”

Because imperfect information games are focused on reacting to what information you have and attempting to control what information you give away to your opponent, it's imperative to be able to determine what that information is.

Since League of Legends is the game that triggered this blog for me, I'll start with talking about its Sight Wards. And it's not the first time I've referred to invisible wards as bad game design. Hell, Ghostcrawler himself has mentioned he thinks LoL's current state of vision control is the opposite of fun (which, while I agree, I feel his approach to changing that is heavy-handed and ignores the fact that some players actually enjoy playing intelligently rather than playing to win via execution.)

Stealthed Sight Wards have a few problems:
  • They have very little interactivity on their own, and are a great example of power without gameplay. Riot hate auras in League of Legends because it's hard to see how much power you're giving with them. Vision is similar.
  • They have very poor Counterplay. While generally, you can sweep them or kill them with pinks if you know where they are...champions without an AA reset cannot kill them on their own upon them being placed, nor can you kill them if you don't already know where they are.
  • They are not good for Clarity. Riot have alleviated this slightly with how trinket wards work in this season with the “ward debris” system for showing where wards WERE placed, but while a ward is stealthed and doing its job, there's almost no way to tell if you have been revealed.

Of course, the last point isn't true around lanes at the highest level of play – you can observe the opponent in that lane for behavioral changes to gauge where a ward was or wasn't placed. It leads to a level of Yomi layering where the player may feign ignorance and buy time for his teammates to make a counterplay.

But when you do not already have vision of nearby players, then you cannot be sure whether or not you are giving information to the enemy team...and in this case, the best option is to err on the side of caution and assume you WOULD be giving away information, thus electing not to go there.

Ambiguous Revelation hits an extreme in high level games of Halo, when the Motion Tracker is enabled. The Motion Tracker is similar to a radar in that it reveals nearby players, but it only does so if they are moving full speed or shooting.

If you are standing still or crouching, you do not show up on the Motion Tracker, and this is an enormous problem for competitive play. If you approach a high traffic area at full speed, and an enemy is hiding around the corner, they know you are coming, but you have no idea that they are there, nor that they know you are coming. It's a Revelation to the opponent that is unclear to you. Because of this, the “correct” play when ever approaching trafficked areas alone is to instead play it extremely slowly and crouch with your best CQB option ready. If they aren't there, you've wasted time and bored yourself with crouching. If they are there, you've got your spray and pray ready for combat.

It leads to really slow, dull gameplay.

While MLG had control of Halo, they left the Motion Tracker disabled to avoid this issue of Ambiguous Revelatiton in lieu of preventing the sharing of free information at all, leaving it up to the players at the highest level to figure out the information on their own through awareness and communication.

Let's say hypothetically 343 insist we need to keep some form of radar, for the sake of casual audience. There are a few approaches they could take to erase Ambiguous Revelation while keeping the flow of information in similar circumstances.

  1. Make the Motion Tracker flash/change colors when you have been revealed on another player's Motion Tracker. Do NOT reveal the location of the player who detected you.
    1. This change alerts you that you have been detected, removing the Ambiguity of the Revelation, but still puts the advantage in the hands of the opponent, as they know your exact location, while you only know that you are in range of the person.
  2. Convert the Motion Tracker to a full-blown Radar, revealing all players as long as they are in range of you.
    1. This change puts the advantage in the hands of the aggressor, giving them free information just for moving around the map. A player constantly moving can spot immobile enemies, even without actually getting them in their sights.
  3. Convert the Motion Tracker into a “spotter” system – If a player is shooting, they show up. They don't need to know whether or not they are near an enemy player, because by shooting they are giving up SOUND that fills the entire map, ensuring they know enemies know their location. If a player is BEING SHOT (in the cross-hairs of an enemy AND taking damage), they show up. Again, they know their location is compromised. Moving or making local sounds (thrust, sprint) would not reveal you, as these sounds are too close range to be certain you are revealed. With this system, the range could be greatly increased without much effect on gameplay (and it actually reduces the advantage players with better sound equipment have over their broke peers).

Those are just a few alternatives off the top of my head, all of which would improve how the game plays at the competitive level versus the currently enabled Motion Tracker in Halo 5 – a full-blown radar, although noobish and “unfair” would have less negative effects on the outcome of gameplay, as players would instead be encouraged to keep moving rather than to stop and sit still, autos primed.

Because not knowing whether your opponent knows where you are or not leads to assuming they'll find out if you play as though they don't. Which leads to playing more cautiously. Which leads to immobile, stale gameplay.

Back on the subject of League of Legends, how do you reconcile this with invisible wards?

DotA2 has quite an interesting answer to that, with its inclusion of Smoke of Deceit. Smoke of Deceit stealths you and all nearby allies for a moderate duration, but attacking or moving within a specific range of enemy units will break your stealth. It's literally a tool to grant you and your team the ability not to be seen by regular wards. In many games of DotA, you will see teams purchase Smoke and make aggressive plays, knowing with absolute certainty they are undetected until they are upon their target. Because they are unambigulous unrevealed, they are able to make this play. Of course, if your game is League of Legends, there's one player on the team who EVERY GAME relies on being unrevealed as long as possible to exert the most pressure on the map...and because of that, vision needs to at least be able to detect people consistently.

Being revealed by abilities in League of Legends, whether Hawkshot, Traps, or various skillshots always give an icon of two eyes on the player, showing them they have been spotted.

One potential way to handle Warding is to drastically reduce the vision radius of wards but make them untargetable – similar to how the Scuttle Crab's shrine works. This would grant counterplay to players who have detected them, as they could move around them. In the case of Wards being placed in brush, after spotting the ward once, players could know how to avoid being spotted as they pass back by that brush a second time.

Another method would be to replace Wards with items that work similarly to Nidalee Traps...granting only an immediate burst of vision on their own, but then simply resting dormant until triggered by an enemy walking directly over them. Again, enemies can avoid the detection by simply moving away from them and taking a different route, but if they happened to trigger them, they know they have been detected and know their options for decisions based off that detection. They are not limited by anticipation of whether they have been detected, and can make smarter decisions based off confirmed information.

In both of these cases, players don't have to fear they have been detected without their knowledge, greatly increasing the amount of aggressive decision-making they are allowed to make, and increasing the interactivity of the game as well as the enjoyment aspect for spectators who don't wish to observe a golf match.

By improving the clarity of whether or not a player is detected, players have less reason to play scared or overly cautious due to inability to valuate their potential – and improves the ability for a player to valuate based off facts, rather than assumptions, and thus improves the health of the game as a whole at its top level of play.

Turning back to Halo momentarily, there are some options that could be explored WITHOUT removing the Motion Tracker in its current incarnation, by modifying one part of the Halo sandbox, its grenades. Most modern shooters include smoke grenades, flash bangs, et cetera to empower teams to push through choke points without being gunned down systematically.

Halo's Frag Grenades could be given a smoking component (Halo 2's actually had that) to enable you to get around a corner unseen (though detected), while its Plasma Grenades could act as a flash bang (they do distort vision in Halo 5), stunning players who look directly into the exploding sun. Splinter Grenades could revert to Pulse Grenades, and send out a radar pulse as they detonate, revealing players on motion tracker if they are nearby its explosion. Each of these would encourage players to grenade around corners before rushing and enable them to have counterplay for corner-crouchers...without actually requiring the removal of the casual playerbase's crutch.


That concludes my discussion about Ambiguous Revelation – I think it's a subject for much debate, but personally I feel it brings more negatives than positives when it comes to how it affects high level competitive play...and should be avoided wherever possible.

Wednesday, September 30, 2015

Designing Necromancy, Part 1: What is Dead May Never Die

So, most of my Audley Enough blogs focus on other games, designed by other people. Last December I had a brief stint that broke that trend where I talked about my Pokémon-esque pet battler called Tensai.

Today, I unveil my WIP Card Game, Necromancy.


Before I actually talk about Necromancy itself, I'm going to talk about what inspired me to make it, and how the game came together. If you're not interested in that, skip to the bulleted list down below.

Sortie

Some time last year, I got gung ho about making a Tetra Master (the FF9 card minigame) inspired card game without randomness. It began with each player placing two cards face down on the 4x4 grid to act as “trap characters” that could be activated later. This would, in theory, encourage players to plan their actions around their pre-set traps.

I never finished Sortie, mostly because I felt that at its core, it was missing something (and, as is common with projects from me, I ran into a bout of depression that pulled me away from working on anything for a while, then just never actually got back around to working on it). However, I still felt in the back of my mind there was a market gap missing in the world for “a real life card game that plays like Triple Triad and Tetra Master.” But work was shelved.

Stockpile

The day before I actually began working on Necromancy, I was working one of those dreaded all-day shifts at my fast food job. Since the work there is mind-numbingly droll, I tend to distract myself by thinking about game projects. In my head, I was toying around with an idea for a board game in my head. The general concept of the game is that players would attempt to create a tower 8 units tall in order to win. Seems simple, right?

There was a catch – you could only build UP by also building OUT – in order to have a tower 2 units tall, you needed a stack one high adjacent somewhere. In order to have one 3 units high, you needed one nearby that was 2 (which meant you needed a third nearby that had to be 1 high!), and so on. You could build your stack on any tile, even if your opponent had already begun stacking there. (However, for you to place the third tile on a stack, you would still have to have the second tile on an adjacent stack, you couldn't just play a third tile on an opponent's stack next to a 2-stack also featuring only opponent tiles.)

I didn't explore the idea further, since it was just mulling about in my head while at work, but I liked the idea of stacking resources. And further, the idea that you and your opponent could stack on the same tile.

Mark Rosewater

If you don't know the name, you're missing out. While checking my phone at work, I saw Morello, a Lead Designer from Riot Games had tweeted to someone who was wondering about getting into game design from being an Electrical Engineer, recommending they read Mark Rosewater's blog for mechanics discussion.

Mark Rosewater is an employee of Wizards of the Coast, and has been a designer on many, many sets of Magic the Gathering over the years. For a long time, he ran a column on the Wizards of the Coast website discussing the design of Magic the Gathering (You've probably seen me link his Timmy/Johnny/Spike thing before.)

I buckled down and started reading some of his old, old articles (from back in 2002). I saw him mention cards that worked from the Graveyard. And I got to thinking...

What if there was a card game where the only playspace was the graveyard?

WHAT ABOUT A CARD GAME CENTERED AROUND NECROMANCY?!

And that is when I took to Twitter and Skype, asking people for the first five things that popped into their head when thinking about Necromancy. Many people mentioned skeletons, or zombies, or liches, or ancient curses. A few mentioned the color green. Corpse Explosion was a recurring response from the friends of mine who knew Diablo 2 like the backs of their carpal tunneled hands.

When trying to concept the game, I thought over a few ideas, but there was one constant: the game would be based around players discarding their cards in order to be able to summon monsters.

Then I thought back to Stockpile, what if they could discard their cards onto a card their opponent discarded? Obviously, this would be a problem (with potential card theft, or simply confusion) if Necromancy were a deck building game, so when I got convinced the Stockpile idea was the right way to go, it was automatically decided that Necromancy would be a single deck game.

  • But what is the GOAL of Necromancy?
    • It's simple, to control more souls than your opponent.
  • What are souls?
    • Souls are the face-down cards discarded by a player onto the Graveyard.
  • How do you control them?
    • By summoning a creature on top of them.
  • How do you summon a creature?
    • Discard it face up onto the stack of souls!

From here, it was clear the stack of souls would act as the resource for the casting cost to summon stronger undead creatures. Using the Stockpile mechanic of being able to stack souls or summon creatures on your opponent's stacks means both players vie for control of the Graveyard simultaneously. Perhaps your opponent wants to summon a big creature somewhere, but you interrupt him by summoning a weaker one on top of it.

I definitely also wanted to include the ability to battle in the game. So I thought about the different types of undead. Skeletons, Zombies, Ghosts, Ghouls, Shades, Vampires, Mummies, Liches, and various other beasts. Skeletons and Zombies tend to just attack things. Ghouls and Vampires are more focused on consuming souls as they wander the night. But Ghosts seem more peaceful. Sometimes they just possess things.

So I divided the potential Actions creatures could take into three categories: Move, Attack, and Possess. The Attack command is divided into two further subgroups: Destroy or Consume. (Whether you may Destroy or Consume is determined by your card, not by the player.)

Creatures that are already summoned may spend their turn repositioning by using the Move command. This can be used to get in range to attack an enemy creature, or simply to pick up souls placed adjacent to the creature, increasing the size of its Soul Stack. (You may not add souls to a Soul Stack where there is already a creature.)

Adjacent Creatures may do battle by Attacking. If the creature is a Destroyer, it simply turns the opposing monster into a face down Soul on its Soul Stack upon a successful battle. If it is a Consumer, the target creature and its Soul Stack are added to the Consumer's Soul Stack to create an even larger stack, all under the control of one player.

Ghosts, Shades, and select creatures of the other types may Possess adjacent creatures. By Possessing a creature, they abandon their own Soul Stack and attach to the new creature (whether you do this to your opponent's creatures or your own is up to you). Possessing does not change ownership of the creature, so the Soul Stack still belongs to your opponent, but you gain control of the creature. You can move it closer to your own larger creatures to be destroyed, or simply have it build up to be really strong for other nefarious plans or traps.

Wait, did you say traps, Audley?

Of course I did. Did you forget the Sortie section already?

There's a trick to facedown cards. Although they are Souls that fuel the summoning of creatures... there is also a command I neglected to mention. Overtake.

If a Soul Stack exceeds the casting cost of a facedown creature (one used as a Soul to fuel a summon), and that facedown creature's casting cost is greater than the casting cost of the active creature on top of the stack, then the player who placed the card facedown may elect to Overtake the active creature, turning the old creature into a soul and summoning their facedown creature to take over the stack. (And again, it doesn't matter who originally summoned the creature. You may overtake your own creatures after having them “Pac Man” other souls by moving around the Graveyard. Wakka wakka wakka wakHOLY SHIT THAT'S A BONE DRAGON.)

That concludes the majority of the base mechanics, apart from one additional tweak I made that I'm still not sure about, it is simply something I'm testing to add further flavor – I've designated the first tile upon which a creature is summoned in the game “The Crypt” – each card has an additional effect for being on The Crypt. So, while you may want to quickly get out a creature in theory, you also want to try to get a strong creature on the first tile, as their Crypt effects are much stronger.


So, how did I create the cards?

Upon seeing how many different types of Undeads there were and knowing the game was going to be a single deck game, I had an idea. What if each class of Undead were a Suit in a regular playing card deck? That's right, Necromancy is a modified version of a standard 52+2 card deck. (Though, I don't currently have anything set for the Jokers. I'll come up with a plan some time.)

The base set's four suits are Skeletons, Zombies, Ghosts, and Ghouls. The other Undead types I've mentioned are pre-planned expansions, because I am a business man and hope to make money off this endeavor. ;)

Assuming the game reaches print, the cards won't have Spades, Diamonds, etc. – they'll simply be ambiguous suits that can be used in place of any of the standard suits. So if you have the base set, and buy one of the two-suit expansions, you could mix and match the suits as you please to make a standard 52 card deck to use for Poker, Blackjack, Spades, or whatever card game you prefer.

When does the game end?

Currently, the “end” conditions are:
  • When either the Graveyard is filled with 16 active creatures, OR
  • When there are no cards left to play.

The First Play Test

Today, I played against myself in the first test of Necromancy and it was illuminating. A few of the problems were execution-related. I made a few mistakes (I'm a noob at my own game).

  • Consumers were really strong and could snowball hard.
    • Part of this was because of one of the card's effects that made it get stronger as its Soul Stack increased. Part of this was because one of the Possessors also buffs a card based off the card's Soul Stack. So the big creature got really big.
    • Another part of this was because the creature was on the Crypt, so the Crypt filled its duty of being a focal position of the game. With the Crypt's location being variable, it means there is a lot of inherent variety in how each game can play out, even if players draw the same cards every time in the same order.
    • Although one creature got really big, there actually was an avenue of counterplay. Because the Graveyard is a 4x4 space, there are 7 spaces that the player controlling the Crypt cannot reasonably reach. As a comeback mechanic, a player can simply Pac Man souls on this L-shaped tile area until they can summon their own fearsome monster.
  • I probably made a mistake in deciding players may only take one Action per turn.
    • I'm still deciding whether to change it to “One Action per active creature” or leave it as-is.
  • Possessors make good Soul fodder and good Overtakers for the player with the lead.
    • If you have the lead, a creature that leaves a Soul Stack behind upon possessing another creature is less risky.
    • This is part of the execution error I had. I was playing myself, so I knew exactly what card was where, and I still moved one of the trailing player's creatures onto a stack with a Ghost that then managed to Overtake the lower cost creature that had moved onto it. That play essentially sealed the game away.
  • There doesn't seem to be enough encouragement to summon weak creatures. Not sure if this is personal perception bias from me playing against myself, or if this is an actual issue. Will have to find out when I actually teach other people the game and play it then.
  • The game had a lameduck ending.
    • Mostly this was because the Consumer got so far ahead that it was unstoppable, and the one creature that gave the trailing player a chance to come back was slain, but lameduck endings are no fun. I will attempt to find a way to make each game go down as close to the wire as possible.

Anyway, that's all I can tell you about Necromancy at its present state in design.

If you own a deck of standard playing cards, and are interested in attempting to teach other people Necromancy and playtesting it yourself, and can be trusted to actually share feedback on your own perceptions, game issues, potential balance issues, et cetera, please, contact me on Twitter @TiberiusAudley and I will be glad to share the info on the base set of cards, as well as a copy of the rules in order to fulfill your own desires to summon and control the undead.


Hope you enjoyed the read, and I look forward to presenting you with a well-polished, strategical card game some time soon!

Saturday, September 12, 2015

Calling the Shots Part 4 – Taking Rounds

We've talked victory conditions and knowing your limits, and even a bit on when it's okay to just go crazy. Today, I'm going to talk about how to allocate resources.

In some team environments, one player determines who gets what resource over the course of a game. In others, it's simply first come, first serve. Maybe it depends on the situation. Maybe it depends on the victory conditions. But regardless, knowing what qualifies as a resource and how to determine who gets it is an important aspect of shot-calling.

Since the majority of my audience are Halo players, I'll address the context of resources in Halo first.

What are the resources in Halo?


If you're playing along at home, your first reaction was probably “POWER WEAPONS!” And congratulations, you got the #1 answer on the board. But power weapons aren't the only resource in Halo.

Map objectives are another obvious resource. Whether it's Oddball, Hill time, the Flag, the Bomb. Someone says “Hey, take hill.” He's allocating a resource.

But from there, what qualifies as a resource becomes a lot more subtle. I'll make a bulleted list.
  • Power Weapons
  • Objectives
  • Power Positions
    • What? How can a position be a resource!? Power positions are important areas of the map which offer escape routes, sightlines, and combat advantages. But you don't want everyone to be in the power positions. Some players have to keep moving, pushing for objective, cutting off pushes, flushing out players, et cetera. Determining who gets to stay in the power position is allocating a resource.
  • Help
    • Other players responding to your call-outs, pushing behind you, or watching your sightlines are a resource. Your teammates are a resource. Who they decide to work with on a moment-to-moment basis determines who receives that resource.
    • As an example of a team that uses this, listen to Towey coach Evil Geniuses. Often, he will tell a player who has just spawned to “Go help x” – he's allocating the resource for the team and ensuring a player isn't left stranded on the enemy side.
  • Communication
    • Even call-outs are a resource. Because it's hard to hear when players talk over one another, it's important to make sure communication is streamlined. A player on the opposite side of the map from teammates should not be trying to talk over those who need to communicate their plans to work together (unless it is pertinent information to those three.) An isolated player making callouts of players his teammates have no possible way to see is flooding a resource, giving information that isn't valuable or useful.
  • Ammo
    • Apart from literally being a resource for your guns, ammo is a resource that sometimes has to be discussed among the team. In stalemate situations (especially H2A's Lockdown TS), a player with a Sniper may not need their Battle Rifle ammo, while his teammates need it for trading or creating shield advantages to set up a push. Allocating weapon ammo among teammates to ensure everyone is combat capable can be the difference between winning or losing a stalemate situation's resolution.

As you can see, there are actually several resources in Halo that need to be split up among the team. Knowing who needs to receive what resource at what time, or who should forego a resource to do something else (such as pushing up and letting the next player to spawn grab a power weapon on your side), are key to shot-calling toward victory.

What are the resources in LoL?

In League of Legends, there are even more resources to track. Many are less nuanced than in Halo, so I'll keep my bulleted list a bit more concise:
  • Gold (minion waves, tower gold, assists)
  • Experience (minion waves)
  • Farm (jungle)
  • Ganks (or pressure from a teammate's presence in general)
  • Vision (where your wards are)
  • Vision denial (where you clear enemy wards, who gets the ward kill)
  • Summoner spells (how many do you expend for a kill)
  • Abilities (especially ults, how many do you expend for a kill / to save someone / who do you use them on in a team fight)
  • Buffs (red/blue/abilities)
  • Globals (TP pressure, global range ultimate pressure)
  • Wave control (what waves you set up to slow push, what waves you just flash farm)

Much of LoL strategy revolves around power spikes and funneling farm into specific players. Whether it's to get them to their power spike sooner, or to get them into a state to counter an enemy power spike, you want to make sure farm goes where it's needed. Experience comes with farm. Who do you try to make sure stays ahead in levels? Do you sacrifice EXP on your support/jungler and rely on team fights / skirmishes to catapult them back with the catch-up mechanics of the game?


Ganks and jungle pressure can determine the outcome of a lane. Determining who gets said ganks may depend on champion match-up, skill match-up, or the opponent's priorities. As a shotcaller, you have to know who needs pressure when.

Expending too many summoner spells (or long cooldown ultimates) for a gank can leave you vulnerable for a long period of time. If you're planning a gank 90 seconds before Dragon, do you all flash to finish the kill and the moderate gold spike? Or, do you let him live, knowing you'll need those flashes for the potential team fight at Dragon? Those flashes could mean a tower kill. Or, if you're out of sync with the team, one flash could mean the play gets turned around. Before the play is made, the shotcaller should make it clear if you're burning summoners and ultimates or not.

Vision needs to be rotated depending on your current focus on the map. Pink wards are not meant to stay in the same place all game. They need to be moved to ensure zones of denial or longer lasting vision. Deep wards need to be placed to know what's coming in a situation. Sometimes, placing deep wards can be risky and requires the escort of your jungler as a support to get the wards down. (Note KT Rolster, or last season's Samsung White often having Score+Piccaboo or Dandy+Mata respectively synchronizing their backs and duo-invading early on to ensure they can get wards down together.)

In both games, it's important to be able to identify your resources and determine where they need to go. A good shotcaller must gauge who needs what when.

If you're struggling to determine how to allocate resources, ask yourself some questions when faced with a decision:
  • What are the victory conditions right now?
  • Who is important to fuel our path to victory?
  • Who is closest to the resource?
    • Do they need it?
  • Will we lose anything if x goes for this resource?
    • Is it worth it?
    • Who else could take it instead?
  • Are we transparent in our resource allocation?
    • Can/Will our opponents try to counter it?
  • Can we deny our opponents' resources?
  • X doesn't have the resources they should, do we sacrifice them and put resources elsewhere?
    • Or do we sacrifice elsewhere to put resources on them?
    • Which path is safer?

Obviously you can't ask yourself these questions each and every time a decision arrives. These are just an exercise to improve. As you improve, you'll find yourself giving better valuation and distribution naturally. As you begin to efficiently distribute resources in a game, you will find yourself with more advantages and leads to press in a game.


That's all for this relatively short bit. Part 5 will be a bit delayed, but I'll discuss how to identify less apparent advantages in order to determine when you have a lead or the ability to create a lead out of a mismatch.

Wednesday, September 9, 2015

Calling the Shots Part 3 - The Efficacy of a Loose Cannon

If you're a League of Legends fan, chances are you've heard the memetic repetition of "Chaos-style" as an explanation describing Unicorns of Love's gameplay in the European LCS. You've probably also heard certain analysts refer to said chaos as "just mistakes."

I'm here to offer a neutral perspective.

I mentioned in Part 2 that it's important to know your limits in the context of a game. You should also be able to objectively admit when an opposing team is superior to you, whether in regards of execution or strategy. It's okay to say “I'm not as good as they are.”

When your opposition have a superior strategical understanding compared to you, how do you win?

You fuck over their plans.


Okay, joke aside: you execute better. You rely on your manual dexterity and ability to pull off risky, low percentage plays in order to bridge the gap. In short, you gamble on your own skill.

In most cases of competitive gaming, players rely on high percentage plays in order to safely position themselves on the road to a victory. After all, safe play avoids mistakes. No mistakes means no room for being punished. But when that route doesn't work, fuck Order. Embrace Chaos. The primeval strategic void.

Keep everything fast paced. Keep everything hectic. Don't leave room for your opponents to breathe or set-up. Don't let battles resolve.

While Unicorns of Love are generally given as the example of a team that lives and dies on their “chaos-style” shotcalling – full of sub-optimal calls and plays that don't necessary make the most strategical sense, there's one team that are notorious for taking the opposite approach.

Elements/Alliance have always been a team afraid to pull the trigger when they're behind. Rather than risk a mistaken call, they avoid taking any shots at all and simply allow themselves to slowly bleed to death.

Froggen, the mid laner of Elements, is often regarded by many as quite possibly the best European mid laner of all time (and rightly so, he almost managed to win a season of OGN Champions). So in terms of execution, it's hard to believe Elements have much to fear from one of their highest impact roles potentially making a mistake.

Quit being a chicken, Froggen. You're the best. Act like it.

I mentioned in Part 2 to always assume your opponents will play the game properly – here I am going to contradict myself. When you've assessed you are mechanically better at the game than your opponent, assume you can force a mistake. Look for the opportunity to force a mistake. It doesn't matter how sub-optimal the call you make is. Make a call. Any call you can feasibly execute. Just go do it.


Before the Halo portion of my readership run away thinking this only applies to LoL, wait. Because I've even used specific examples in the past of the same notions. When I made a bracket preview for the HCSSeason 1 Finals, I mentioned in the Denial vs Str8 Rippin match-up that I thought Str8 Rippin could be favored on Shrine Team Slayer. My exact quote: “Str8's key to victory will be to keep the game fast and chaotic – don't let stalemates evolve. The less structured the game is, the more it's in Str8's favor.”

In this case, Str8 had a ton of explosive talent on their team with Str8 Sick, Prototype, and Naded's dominant Free for All gameplay. They were all players likely to win individual battles or be able to naturally react to battles going on elsewhere to clean them up – faster reactions, so to speak.


Chaos increases the degree of reactive gameplay required. Because it's harder to decide or predict what will happen next. You have less opportunity for proactive planning due to the increased pressure across the map, and thus must simply play your opponents rather than your own game.

If your opponents out-skill you, or execute better on an individual level, they will come out ahead in a chaotic situation.

And if you're thinking I'm talking out of my ass, and there's no precedent for using sub-optimal tactics to upset someone with superior strategic or tactical understanding:

Try reading about Anti-computer Tactics from chess. 


In the “Brains in Bahrain” event mentioned, the player knew he was superior in late game decision-making over the computer, so rather than try to play generally optimal openings, he chose to take the generally “riskier” route of playing hyperconservative (the best defense is a good offense!). Once he survived the computer's pre-planned strategical opening, the computer was in unfamiliar territory with less decision trees to allow it to properly analyze the situation. Because of this, the player managed to win two consecutive games. (In retrospect, this may be what Froggen is attempting to do when he plays so passively from behind.)

So, now that we've established that intentional sub-optimal gameplay is a real strategy with at least some merit... how do you go about shotcalling this manner?

The most important thing to note is that every voice is important when playing chaotic. You need a much higher information flow than slow-playing or taking a methodical, measured approach.

First, you need to identify a weakness in the enemy line-up. Whether this is a strategic weakness they have, or a player who you simply expect not to react properly to a surprise engagement from your team.

Attack the weak link. Regardless of whether contextually attacking that point makes sense at the given time, do it anyway. Even if it means giving something else up elsewhere. Don't hesitate.

Do they have a top laner who relies on being on an island? Send four people up there, dive the tower. Push the tower. Start to push another tower. Someone's coming? Abandon the push, go engage that player rotating up through the jungle.

Is this Lockout TS stalemate being held together by a player sitting BR1 who's known for losing BR fights? Hard push down low. Get people underneath library to ensure the spawns get split when you inevitably secure a kill or two. Now raise the pace. No huddle offense time.

(Mild tangent: Another League of Legends example of putting power into individual execution rather than team strategy can be seen in Season 3 Lemondogs. Lemondogs were a team that lived and died by 1-3-1 split pushing. They all had confidence they would outplay their opponents, so why wouldn't they just pressure every lane, right?)

This brings up point two: put your best players in position to make big plays on their own.

Pressure somewhere. Let them pressure somewhere else. You don't need to be in the same location to be impacting the game in the highest manner. (DO YOU FUCKING HEAR ME COAST? YOUR OLAF DOES NOT HAVE TO STAND NEXT TO SIVIR WHEN HE'S FOUR KILLS AND 200 CS UP OVER HIS OPPONENT AND PUSHING AN INHIB UNCONTESTED!)

If your best player needs to be on his own in order to be effective, PLAY AROUND THAT PLAYER, rather than around the enemy team. Make the enemy team react to that player.

Peacock somewhere, feigning strength. Make it look like you're going to do something you have no intention of doing to see if there's a reaction.

Point 3: Once shit has hit the fan, keep throwing more shit into it.


Again, the point of Chaos-as-a-Gameplan is to introduce situations your opponent has not experienced (but you possibly have) in order to come out ahead.

The more pressure you keep applying, regardless of how wise it is, the more likely the opponent is not to know how to react to it, and to make a mistake.

And finally, call off the dogs when you've obtained a clear advantage.

Unless you have no game sense at all and don't know how to play properly with a lead, then once you've gotten a lead, you should play like you have it. If you think your lesser-executing opponents can wrest control of the match back from you while you return to optimal play, then chances are you were going to lose regardless of what strategy you employed.

Anyway, again, “chaos style” shot-calling is not “just mistakes” but rather intentional sub-optimal shotcalling in order to try to shift the game out of your opponent's comfort zone and into a manner where you can reign supreme.

It is not a be-all, end-all approach to playing a game, nor should it ever really be your first choice. It requires a high level of execution (much like S4 Fnatic's obsession with kite comps). If you are confident you are better at executing on a micro level than your opponents, by all means, try to play a chaotic style of play. It's admittedly a bit disrespectful, and by definition not the best way to play. But it can work and has valid reasons for doing so.

Again, it is by definition an unsafe way to play. Much like trying to aim a loose cannon.


This concludes part 3 of Calling the Shots – although this one was more aimed toward responding to a perspective than how to actually improve as a shotcaller, I felt it belonged in the series. I'll be working on Part 4 soon as well and trying to get that out soon.